As an agenda collector, you can add a decision / summary to an item directly in the reading section of FirstAgenda Prepare on the web version.
How to add a decision step by step
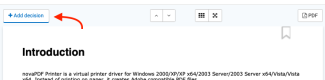
- Click Read Agenda
- Find the agenda and item (s) to which you want to add a decision
- Click Add Decision at the top left of the agenda item
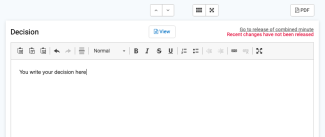
- Write your decision in the text field. Your text is automatically saved along the way
- When you have finished adding decisions to your agenda items, they should be released collectively from the front of the agenda
- Click to the front of the agenda and click on
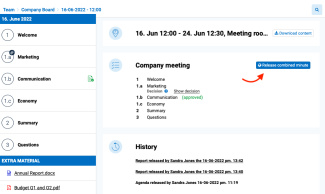
In the overview you can see which points you have added a decision on. This is indicated by the text "Decision" followed by a blue exclamation mark.
When you release the decisions, an email will be sent to the meeting participants stating that a report is available in FirstAgenda Prepare. Here you have the opportunity to add an overall comment, as well as a comment next to each decision point that is sent in the notification email. Meeting participants can read the comments on the front page of the meeting, as well as see an overview of which points decisions have been added to.
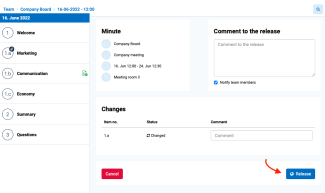
- Click "Release" to finally release the minutes
Important: As long as you have not released, your meeting participants will not be able to see your decisions. Other agenda collectors who are members of the committee can see decisions and make changes in them.
It is not possible to add a resolution if you are using Internet Explorer 9 or earlier.
It is not possible to add a resolution to non-content items. See how to add content to points here.
You can also still create your decision or minutes inside the meeting creation itself. Read more about how to create an alternative minutes here.